|
|
|
THIS WEBSITE HAS MOVED TO "www.theamateurchemist.com". Please feel free to visit... :)
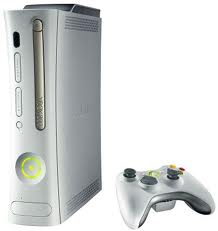
Converting an Xbox 360 Power Supply to a Lab Power Supply
There are MANY, MANY experiments you can do when you have an adequate power supply. Within the first day of having mine, I have done around 3-4 different electrolysis experiments, with many more planned for the future including a potassium chlorate cell. :) As many of you may have heard, a computer (desktop PC) power supply makes a excellent lab power supply with just a few modifications. Many of you probably have old computers lying around that you could modify, and if you do then I encourage you to look at this website. It has a very good tutorial on modifying it for proper lab use.
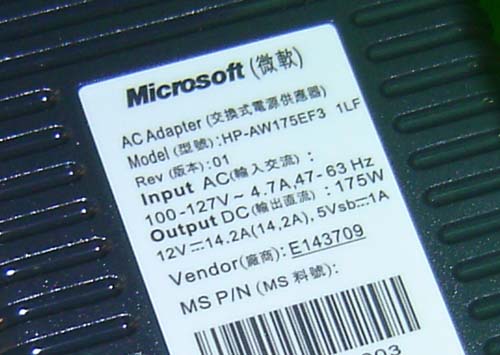
One of my friends is currently trying to get me one, but in the meantime I was looking for something that would give out 12 volts with a high number of amps. I happened to have an old Xbox lying around that didn't work anymore, so I looked at the power supply for it, and it was perfect. Mine gave out 12 volts at 16.5 amps. I set about to modify it for lab use. As most people have a friend or themselves have an old Xbox 360 that got the red ring of death or just doesn't work anymore, this seemed like a good thing to make a tutorial on.
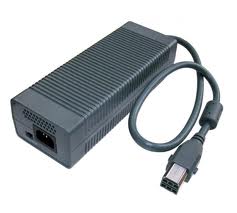
I took a scissors, and cut the wire right before the plug that goes into the Xbox (I will include pictures as soon as I take them). I then pulled back the insulation about 4 inches, and proceeded to strip all of the wires. There was something like 4-5 black, 4-5 yellow, 1 red, and 1 blue wire. The yellow is the +12 volt wire, the black is the ground, the blue is the power on, and the red is the +5 volt wire. If you try to plug it in now, it will give you a yellow or red light and not work right. You need to connect the red wire and the blue wire together. Once you connect these 2 wires, the unit should power on. Next connect all of the yellow wires together into one big wire, and do the same for the black wires. This is pretty much it for that part. The yellow is the positive and the black is the negative. It will now give out 12 volts at up to how ever many amps it has.
However, for most electrolysis experiments, this is way too much power. Most experiments only need around 5 volts at around one amp. An example is a chlorate cell. This website has a great tutorial on wiring up some resistors together to go from 12 volts to 5 volts on the bottom portion of the article. All the parts will most likely cost around $30 if you get them from a local store like radioshack. However, my local radioshack didn't have the right resistors so I was forced to order them online. It is much cheaper if you do this as well. I got twice the amount of resistors I needed for only $12 + $2 shipping. This was at Digi-Key, a well known electronics store on the web. You can get the 4.7 ohm, 10 Watt resistors here, and the 22 ohm, 5 Watt ones here. I just ordered mine today. Once they come I will test them out and see how they work. Once you do this, you can do just about any electrolysis experiment you can imagine. I will have several new experiments going up in the future dealing with some of these experiments.
I am not liable for anything you do!!! Read the Disclaimer Section!
One of my friends is currently trying to get me one, but in the meantime I was looking for something that would give out 12 volts with a high number of amps. I happened to have an old Xbox lying around that didn't work anymore, so I looked at the power supply for it, and it was perfect. Mine gave out 12 volts at 16.5 amps. I set about to modify it for lab use. As most people have a friend or themselves have an old Xbox 360 that got the red ring of death or just doesn't work anymore, this seemed like a good thing to make a tutorial on.
I took a scissors, and cut the wire right before the plug that goes into the Xbox (I will include pictures as soon as I take them). I then pulled back the insulation about 4 inches, and proceeded to strip all of the wires. There was something like 4-5 black, 4-5 yellow, 1 red, and 1 blue wire. The yellow is the +12 volt wire, the black is the ground, the blue is the power on, and the red is the +5 volt wire. If you try to plug it in now, it will give you a yellow or red light and not work right. You need to connect the red wire and the blue wire together. Once you connect these 2 wires, the unit should power on. Next connect all of the yellow wires together into one big wire, and do the same for the black wires. This is pretty much it for that part. The yellow is the positive and the black is the negative. It will now give out 12 volts at up to how ever many amps it has.
However, for most electrolysis experiments, this is way too much power. Most experiments only need around 5 volts at around one amp. An example is a chlorate cell. This website has a great tutorial on wiring up some resistors together to go from 12 volts to 5 volts on the bottom portion of the article. All the parts will most likely cost around $30 if you get them from a local store like radioshack. However, my local radioshack didn't have the right resistors so I was forced to order them online. It is much cheaper if you do this as well. I got twice the amount of resistors I needed for only $12 + $2 shipping. This was at Digi-Key, a well known electronics store on the web. You can get the 4.7 ohm, 10 Watt resistors here, and the 22 ohm, 5 Watt ones here. I just ordered mine today. Once they come I will test them out and see how they work. Once you do this, you can do just about any electrolysis experiment you can imagine. I will have several new experiments going up in the future dealing with some of these experiments.
I am not liable for anything you do!!! Read the Disclaimer Section!
